
A hiring pipeline is the set of stages every candidate moves through, so you always know who is where in your process. AvaHR pipelines are fully customizable, so you can match the exact steps your team uses to hire.
Where to find your pipelines
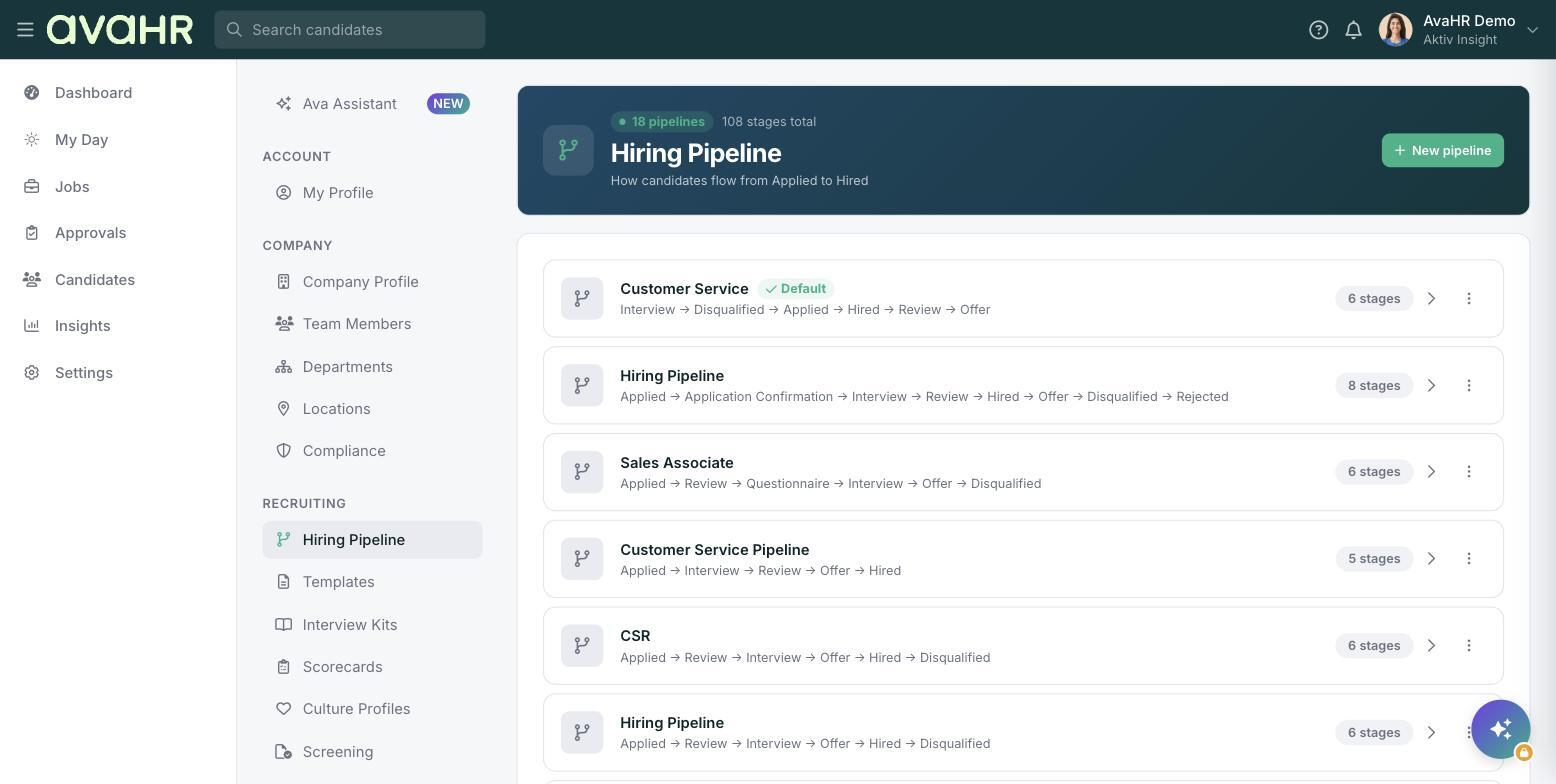
Go to Settings in the left sidebar, then open Hiring Pipeline under the Recruiting group. The page is titled Hiring Pipeline with the line "How candidates flow from Applied to Hired."
Each pipeline appears as a row showing its name, its stages in order (for example, Applied → Review → Interview → Offer → Hired → Disqualified), and a stage count. The pipeline your account uses by default carries a Default badge.
Create a new pipeline
- Click New pipeline in the top right.
- Give your pipeline a clear name, such as the role or team it is for.
- Review the starting stages and adjust them to fit how you hire.
A typical pipeline includes stages like Applied, Review, Interview, Offer, Hired, and Disqualified. You can rename stages, add new ones, remove ones you do not need, and reorder them so the flow reads left to right the way your process runs.
Edit the stages in a pipeline
Open any pipeline row to edit its stages. From the stage editor you can:
- Rename a stage.
- Add or remove stages.
- Change the order stages appear in.
- Set up automations that run when a candidate enters the stage.
Automations, called stage triggers, can send an email or SMS, send a questionnaire, or request a scorecard the moment a candidate lands in a stage. To set these up, see Pipeline Triggers.
Using your pipeline
When you post a job, its Hiring pipeline is preset to your account default, and you can choose a different one for that role. As candidates apply and progress, you move them from one stage to the next, and any triggers on those stages run automatically.